When your Anker ergonomic mouse suddenly stops responding, it can derail your entire workday or gaming session. The frustration of a frozen cursor, unresponsive buttons, or intermittent connectivity is all too familiar for users who rely on these precision devices. If your Anker ergonomic mouse not working properly, you’re not alone—this common issue affects thousands of users monthly. This guide delivers immediate solutions for power failures, connectivity problems, and hardware malfunctions across all Anker ergonomic mouse models, whether you’re using a wireless version with USB dongle, Bluetooth model, or wired configuration.
Power Status and Indicator Light Diagnosis
Your Anker mouse communicates its operational state through visual indicators, making this the critical first step in troubleshooting any malfunction. Ignoring these signals wastes valuable time pursuing unnecessary repairs when the solution might take seconds.
Identify Power Failure Symptoms
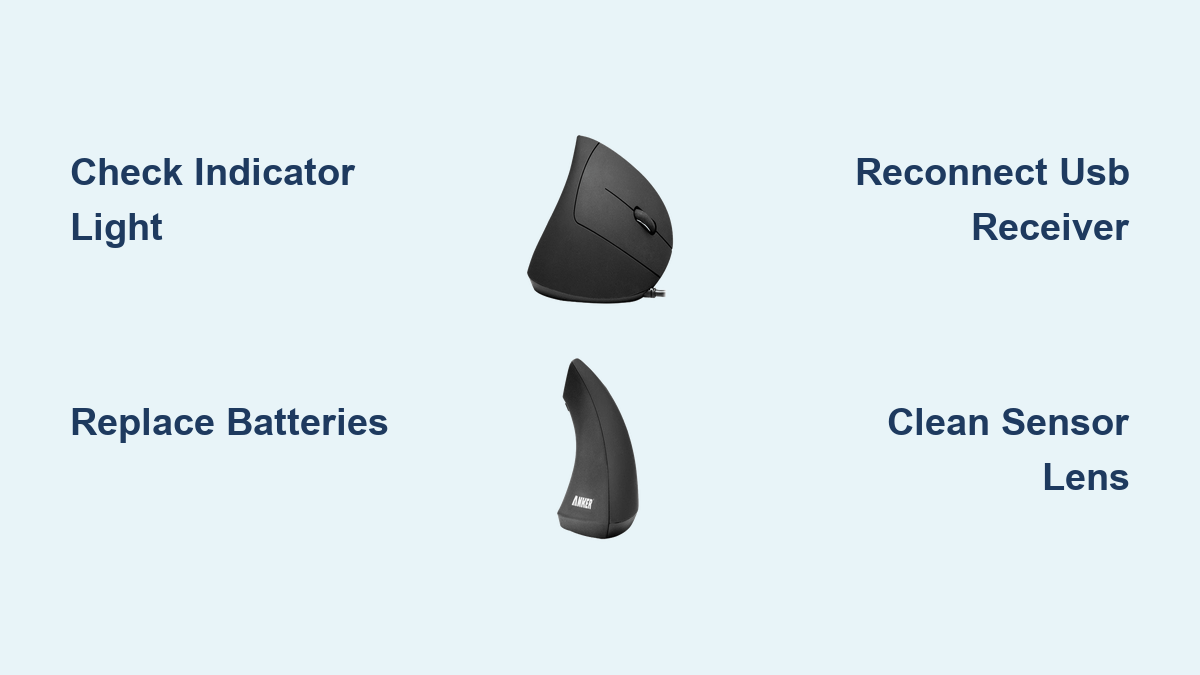
A functioning Anker ergonomic mouse typically displays a red or blue indicator light when powered and active. When your mouse appears dead with no response to movement or clicks, check for these visual cues first. If no light appears whatsoever, you’re dealing with a complete power failure that requires immediate attention to battery or charging systems.
Pay close attention to light behavior patterns: a steady light indicates normal operation, while flashing often signals low battery, pairing mode, or hardware errors. Some models use different colors to communicate specific states—blue might indicate Bluetooth connection while red shows USB receiver pairing. Consult your specific model documentation if indicator behavior doesn’t match general patterns.
Cross-Computer Power Testing
Connect your Anker mouse to a different computer—ideally one running a different operating system—to determine if the problem originates with your mouse or computer. If the mouse functions correctly on the alternate system, focus your troubleshooting on your original computer’s USB ports, drivers, or software configuration.
Conversely, connect a different working mouse to your original computer. If the alternative mouse functions normally while your Anker mouse does not, you’ve confirmed that the Anker device itself requires attention. This distinction determines whether you should focus efforts on mouse hardware or computer system issues.
Battery Replacement and Power Restoration
Power-related issues account for over 60% of Anker ergonomic mouse malfunctions, making this the most common—and easiest to fix—problem category. Whether your model uses disposable AA batteries or an internal rechargeable cell, systematic power troubleshooting should be your first approach.
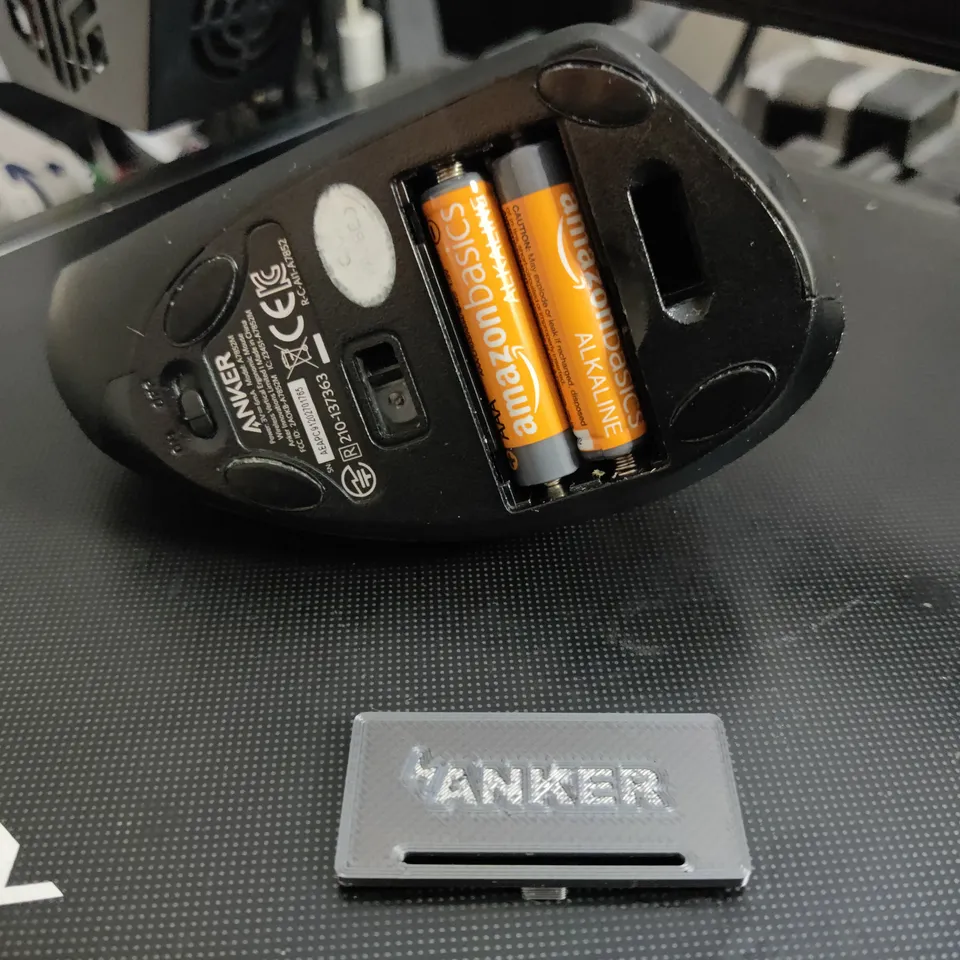
Replace AA Batteries Properly
For AA battery models, begin by opening the battery compartment on the bottom of the mouse and inspecting installed batteries. Even new batteries can be defective or depleted, so use a fresh set from a newly opened package. Ensure proper polarity alignment during installation—most Anker mice have clear positive and negative markings, and reversed batteries won’t provide power.
Before installing new batteries, inspect the compartment for corrosion or debris that might interfere with proper contact. Clean contact points with a dry cloth and ensure springs make solid connections with battery terminals. After installation, test for indicator light functionality immediately—this confirms successful power restoration.
Rechargeable Model Charging Protocol
For rechargeable Anker ergonomic mice, insufficient charge frequently causes apparent power failures. Connect the mouse to a power source using the provided charging cable and allow it to charge for at least 30 minutes before testing. Some models feature a small charging indicator light that illuminates during charging—no light may indicate a faulty cable or end-of-life internal battery.
Use the original charging cable whenever possible, as third-party cables sometimes deliver inconsistent power. If your mouse still won’t power on after proper charging, try a different power source such as a wall adapter instead of a computer USB port, as some ports provide insufficient power for charging.
Wireless Connectivity Failure Solutions
Wireless Anker mice depend on stable connections between the mouse, its receiver, and your computer. Connectivity problems manifest as cursor lag, intermittent response, complete disconnection, or failure to recognize the mouse at all. These issues require targeted troubleshooting based on your specific wireless configuration.
USB Receiver Troubleshooting Protocol
Confirm the USB receiver is fully inserted into your computer’s port—these compact dongles can appear seated while maintaining only marginal contact. Press firmly and observe for system recognition. If no response occurs, try a different USB port, preferably one directly connected to your motherboard for desktops or a side port on laptops.
Test your mouse through multiple USB ports to identify whether the issue is port-specific. Ports directly connected to the motherboard typically provide more consistent power delivery than front-panel ports or hub connections. If the mouse functions through certain ports but not others, focus on repairing or replacing the non-functional ports.
Bluetooth Pairing Reset Procedure
For Bluetooth models, ensure your mouse is in pairing mode by pressing and holding the bottom button until the indicator light flashes rapidly. On your computer, access Bluetooth settings, enable Bluetooth if disabled, and search for available devices. Look for your Anker mouse—often listed by model number—and select it to complete pairing.
Bluetooth interference from other devices can disrupt connections. Temporarily disable competing Bluetooth devices and attempt to establish a stable connection away from potential interference sources like WiFi routers or microwave ovens. If pairing fails repeatedly, remove the device from Bluetooth preferences, restart both devices, and attempt pairing again.
Button Malfunction Repair Guide
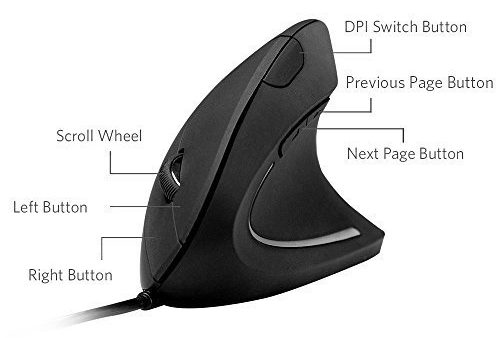
Mouse buttons experience the most physical stress of any component, making them prone to wear and failure. From primary left/right buttons to specialized DPI adjusters, each can malfunction in different ways requiring specific fixes.
Primary Button Restoration
When left or right primary buttons become unresponsive or require excessive force, begin by testing functionality across different applications. If buttons work in BIOS but not your operating system, software conflicts are likely the culprit rather than hardware failure.
For buttons that occasionally register clicks but require multiple presses, internal switch contacts may have degraded from extended use. Mechanical switches have finite lifespans measured in millions of clicks—heavy users can reach this limit within months. Cleaning around button mechanisms with compressed air may temporarily restore function, but permanent repair typically requires switch replacement.
DPI Button Troubleshooting
The DPI button allows on-the-fly cursor sensitivity adjustments. When non-functional, verify it genuinely isn’t working by pressing multiple times while observing cursor speed changes. Some users expect immediate visible feedback, but sensitivity changes may be subtle.
If cleaning and software troubleshooting fail, the physical button component has likely failed. Replacement requires opening the housing and soldering a new switch—advanced work that may not be cost-effective compared to mouse replacement for most users. Consider this repair only if your mouse is otherwise in excellent condition.
Sensor and Tracking Issue Resolution

When your Anker mouse has power and appears connected but fails to move the cursor properly, the sensor assembly requires attention. Tracking issues manifest as unresponsive cursor, erratic movement, jumping, or complete tracking failure.
Surface Compatibility Testing
Optical and laser sensors require appropriate surfaces for accurate tracking. Highly reflective surfaces, glass tables, and glossy plastics can confuse sensor readings. Test your mouse on a standard mouse pad or plain non-glossy surface to determine whether surface issues cause the problem.
If tracking works on some surfaces but not others, simply changing your work surface resolves the issue. Mouse pads designed specifically for optical and laser sensors provide optimal tracking surfaces that eliminate most surface-related tracking problems.
Sensor Lens Cleaning Technique
Dust, debris, and accumulated dirt on the sensor lens represent the most common cause of tracking failure. Locate the sensor on the bottom of the mouse—a small circular or rectangular window—and clean it gently using a soft, dry cloth or slightly dampened cotton swab. Avoid cleaning solutions that might leave residue.
For stubborn debris, lightly breathe on the sensor to create moisture before wiping clean. Pay special attention to the edges of the sensor housing where debris accumulates. Perform this cleaning weekly as preventative maintenance to avoid future tracking issues.
Driver Management and Software Fixes
Outdated, corrupted, or conflicting mouse drivers represent one of the most common yet frequently overlooked causes of Anker ergonomic mouse malfunction. Proper driver management resolves many apparent hardware issues.
Windows Driver Reinstallation Process
Access Device Manager by right-clicking the Start button, navigate to “Mice and other pointing devices,” and locate your Anker mouse. Right-click and select “Update driver” to search for available updates. If Windows finds newer drivers, install them and restart.
When automatic updates fail, manually uninstall the current driver, disconnect your mouse, restart your computer, and reconnect the mouse. Windows will reinstall the driver from scratch during this process, often resolving persistent issues.
Software Configuration Reset
Locate Anker configuration software on your computer and look for options to reset all settings to defaults. This removes problematic custom configurations that might interfere with basic mouse function. Third-party mouse utilities can conflict with Anker software—temporarily uninstall competing applications to determine if they cause the malfunction.
When reset procedures fail, completely uninstall Anker software through Control Panel, restart your computer, then download the latest version from Anker’s official website for a clean installation.
Preventative Maintenance and When to Replace
Regular maintenance extends your Anker ergonomic mouse lifespan and prevents issues before they occur. Knowing when replacement makes more sense than continued repair saves time and frustration.
Environmental Protection Measures
Store and use your mouse within manufacturer-specified temperature ranges—extreme cold temporarily affects battery performance while extreme heat causes permanent damage. Keep your mouse away from strong electromagnetic fields from power supplies or motors that can interfere with wireless operation.
Perform weekly maintenance: clean sensor lenses, check battery contacts for corrosion, and inspect cables for damage. For wireless models, periodically remove and reinsert the USB receiver to clean contact points and ensure solid connection.
Cost-Effective Replacement Decision
Compare repair costs against new mouse pricing—most users find parts, tools, and time investment exceed the value of budget or mid-range mice. If your mouse is several years old with accumulated wear, additional failures are likely even after addressing current issues.
Check Anker’s warranty coverage through their website—many models include extended protection that may provide free replacement. For professionals or competitive gamers dependent on reliable equipment, new mice provide known reliability that outweighs repair risks for older devices.
By systematically working through these troubleshooting categories, you can identify your Anker ergonomic mouse malfunction cause and take appropriate action. Most power and connectivity issues resolve quickly through simple interventions, while persistent button and sensor problems often indicate hardware wear making replacement the practical choice. When troubleshooting reaches its limits, Anker’s support resources and warranty coverage provide additional options for restoring your productivity without unnecessary frustration.
Leave a Reply