That moment when you unbox your new Branch Ergonomic Chair should be exciting, not frustrating. Yet many professionals find themselves staring at scattered components and cryptic instructions, wondering why assembling what should be a straightforward office chair feels like solving a complex puzzle. The good news is that with the right approach and understanding of Branch’s thoughtful design, you can transform those components into your new comfort headquarters in under an hour. This complete Branch ergonomic chair assembly guide walks you through every critical step, ensuring your chair performs exactly as engineered for maximum comfort and support.
Branch Furniture provides three essential resources to guarantee your assembly success: a detailed Assembly and User Guide with clear diagrams, an Assembly Video demonstrating the entire process visually, and a Usage Video showing how to optimize your chair’s adjustments post-assembly. Whether you’re assembling the standard Ergonomic Chair or the feature-rich Ergonomic Chair Pro model, this guide synthesizes all available information into a streamlined process that eliminates guesswork and prevents common assembly mistakes that could compromise your chair’s performance.
Unboxing Your Branch Ergonomic Chair: What to Expect
Before touching a single tool, proper unboxing sets the stage for smooth assembly. Lay out a clean workspace with at least six feet of clearance around your assembly area—carpeted floors or a moving blanket prevent component scratches and keep small parts from rolling away. Start by opening all boxes systematically, removing components carefully without forcing them from protective packaging. Stack parts in assembly sequence: base and casters first, followed by the seat mechanism, backrest, armrests, and accessories.
Identifying All Components Before Assembly Begins
Branch’s Assembly and User Guide includes detailed parts identification diagrams—use these immediately to verify you have every component. The standard Ergonomic Chair typically includes a five-star base, five casters, gas lift cylinder, seat pan assembly, backrest, armrests, and hardware bag. The Ergonomic Chair Pro adds enhanced lumbar support components and potentially additional adjustment mechanisms. Take 5-10 minutes to match each physical part to its diagram in the guide—this small investment prevents discovering missing pieces mid-assembly when you’re committed to the process.
Common Missing Parts and How to Verify Your Kit
If any components appear missing, don’t proceed with assembly. Instead, compare your hardware inventory against the checklist in your Assembly and User Guide. Common issues include missing retaining clips for casters or specialized bolts for the Pro model’s enhanced lumbar system. Branch’s support team can quickly resolve these issues—contact them via live chat (9 AM-5 PM Eastern Time) or email hello@branchfurniture.com with photos of your inventory and the relevant guide page. Having this verification step complete before assembly begins saves significant frustration later.
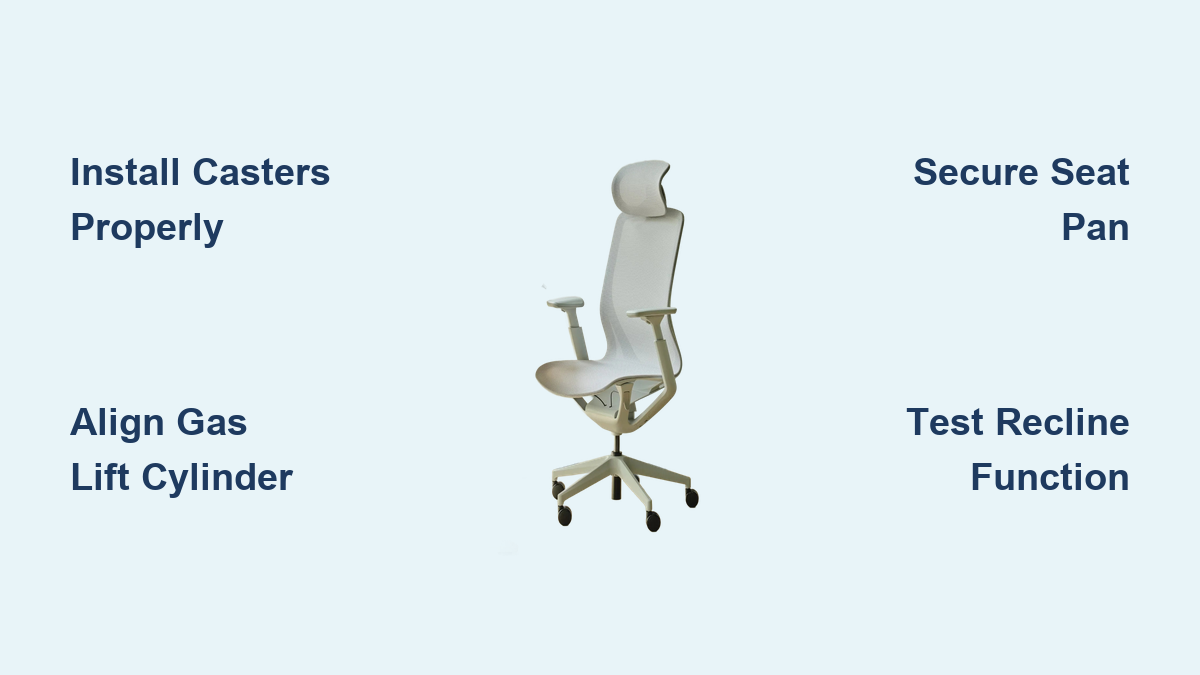
Installing Casters on Your Branch Ergonomic Chair Base

The foundation of your chair’s stability starts with proper caster installation. Lay the five-star base face-up with the center cylinder pointing upward. Take each caster individually and press firmly into the receptor hole at the end of each base arm until you hear a distinct click—this sound confirms the retention mechanism has engaged. Give each caster a gentle tug after installation to verify it’s secure before moving to the next one.
Why Proper Caster Installation Prevents Wobble Issues
A wobbly chair almost always traces back to improperly seated casters. When fully engaged, the caster’s internal locking mechanism clicks into place against the base’s receptor. If you skip this verification step, your chair may develop uneven contact with the floor, causing instability that worsens with use. After installing all five casters, flip the base upright and gently rock it—any rocking motion indicates one or more casters need reseating. Press firmly on the high corner until you hear that definitive click.
Troubleshooting Caster Installation Problems
If a caster refuses to click into place despite firm pressure, check for manufacturing debris in the receptor hole—small plastic shavings sometimes interfere with proper seating. Wipe the area clean and try again. Never force a caster with tools, as this can damage the retention mechanism. If problems persist, contact Branch support before proceeding, as attempting to use the chair with improperly installed casters risks uneven wear and premature failure of the wheel mechanism.
Connecting the Gas Lift Cylinder for Smooth Height Adjustment
The gas lift cylinder is your chair’s height adjustment heart, and proper installation ensures years of reliable performance. Most Branch chairs ship with the cylinder pre-attached to either the base or seat mechanism, but if yours is separate, slide the wider end into the base’s central receptor. The cylinder should slide in smoothly without excessive force—if resistance occurs, rotate it slightly while applying gentle pressure until it seats completely.
Proper Cylinder Alignment Techniques
Misalignment is the primary cause of stiff height adjustment. The cylinder must sit perfectly vertical within the base receptor. Before connecting to the seat pan, verify the cylinder stands straight by eyeing it from multiple angles. Some models include a plastic retaining clip that snaps into place around the cylinder base—your Assembly and User Guide specifies if your configuration requires this step. Install it fully before proceeding to ensure the cylinder won’t shift during seat attachment.
Testing Height Adjustment Before Full Assembly
After connecting the cylinder to the base but before attaching the seat pan, test the height mechanism by pressing the release lever. The cylinder should extend and retract smoothly through its full range. If resistance occurs, disconnect and reseat the cylinder—addressing this now prevents frustration after the chair is fully assembled. This pre-assembly test takes 30 seconds but saves significant troubleshooting time later.
Attaching the Seat Pan: Critical Alignment Steps
With the base and cylinder properly connected, position the seat pan assembly directly above the cylinder stem. Lower it straight down without tilting—any angle during connection risks cross-threading the receptor. The seat pan should slide onto the cylinder with minimal resistance; if you need to force it, lift and realign before trying again. Once seated, install any retaining clip or hardware specified in your guide, following torque recommendations to avoid under- or over-tightening.
Securing the Seat to the Gas Lift Cylinder
The connection point between seat pan and cylinder carries your full body weight, so proper securing is non-negotiable. Most configurations use a spring clip that snaps into a groove on the cylinder—push down firmly on the seat pan while engaging the clip to ensure full contact. For bolted connections, tighten incrementally in a star pattern if multiple bolts are present. After securing, test the height adjustment mechanism again to confirm smooth operation with the added weight of the seat.
Testing Seat Stability Before Adding Backrest
Before proceeding to the backrest, perform a stability check by sitting gently on the seat (without the backrest) and testing the height adjustment. The mechanism should move smoothly without lateral play. Any wobble at this stage indicates improper cylinder seating—disassemble and retry before adding additional components. Addressing stability issues now prevents having to disassemble the entire chair later.
Installing the Backrest for Optimal Lumbar Support

Approach backrest installation from behind the chair, aligning the connectors with the receptor points on the seat pan’s rear. The backrest has a distinct top (with headrest compatibility) and bottom (with lumbar support), so verify orientation using diagrams in your guide. Slide the connectors straight in until you feel and hear them click into place—this connection supports your entire upper body weight during recline.
Pro Model Backrest Installation Differences
The Ergonomic Chair Pro features an enhanced lumbar system requiring specific calibration during installation. Follow the Pro-specific section in your documentation to route adjustment cables correctly—improper cable routing affects multiple adjustment mechanisms simultaneously. The Pro backrest typically includes additional connection points that must engage in sequence, so don’t force it if resistance occurs. Consult the Assembly Video for visual guidance on the precise angle and pressure needed for Pro model connections.
Calibrating the Recline Mechanism During Assembly
After securing the backrest, test the recline function by leaning back gently. The mechanism should provide smooth resistance through its range without sudden drops or catches. If the backrest feels too loose or stiff, your Assembly and User Guide specifies adjustment points—typically a tension knob beneath the seat pan. Make minor adjustments now while the chair is still on the floor rather than after full assembly when access becomes more difficult.
Positioning Armrests for Perfect Ergonomic Alignment
Locate the armrest mounting points on the seat pan’s sides—left and right armrests are often marked or shaped differently. For tool-free models, press firmly until you hear the click mechanism engage; for bolted models, insert hardware by hand first to avoid cross-threading. Once attached, push down firmly on each armrest to confirm stability—there should be no lateral movement when pressure is applied.
Standard vs. Pro Model Armrest Attachment Methods
The standard Ergonomic Chair typically uses a simple press-fit mechanism, while the Pro model may feature multi-adjustment armrests requiring specific initial positioning. Pro armrests often include height, width, and pivot adjustments that should be set to neutral positions during assembly. Your Assembly Video demonstrates the precise angle and pressure needed for Pro model armrest installation—watch this segment carefully as the enhanced adjustment mechanisms require more precise engagement than standard models.
Initial Armrest Positioning for Immediate Comfort
After installation, set armrests to a neutral position where your elbows rest at 90 degrees with shoulders relaxed. This initial setup prevents strain during your first use while you determine your ideal positioning. The Usage Video demonstrates proper armrest height relative to your desk surface—refer to it after assembly to fine-tune your settings for optimal ergonomic support.
Troubleshooting Common Branch Chair Assembly Issues
Even with careful assembly, you might encounter issues that affect performance. A wobbly chair usually indicates a caster not fully seated—flip the base upside down and press firmly on each caster until clicks are heard. Stiff height adjustment typically means the gas cylinder isn’t fully seated at one connection point; disassemble and reconnect ensuring straight alignment. Stripped threads often result from cross-threading—start all bolts by hand in reverse until they drop into threads naturally before tightening.
Fixing a Wobbly Base After Assembly
If your chair wobbles after full assembly, systematically check each connection point starting with the casters. Press down firmly on each corner—if one corner feels higher, that caster needs reseating. If wobbling persists, verify the gas cylinder is fully seated in both the base and seat pan receptors. The cylinder must be perfectly vertical; slight misalignment creates instability that worsens with use.
Solving Stiff Height Adjustment Problems
When the height adjustment lever feels stiff or unresponsive, first ensure the cylinder is fully seated at both ends. If properly connected, check for manufacturing debris around the lever mechanism—sometimes small plastic shavings interfere with smooth operation. A drop of silicone lubricant (never oil-based) on the lever pivot point often resolves stiffness. Persistent issues require contacting Branch support, as the gas lift mechanism may need replacement.
Addressing Loose Connections and Squeaks
Occasional squeaks during movement indicate a connection point needing slight tightening. Focus on the backrest connectors and seat pan hardware—re-tighten to the torque specifications in your guide. Never overtighten, as this can strip threads. For persistent squeaks, a small amount of graphite powder (not oil) on moving parts often eliminates noise without attracting dust.
Maintaining Your Assembled Branch Ergonomic Chair
After successful assembly, regular maintenance preserves performance. Every three months, inspect all connection points and fasteners, tightening any that have loosened through normal use. Clean surfaces with a damp cloth and mild cleaner—avoid harsh chemicals that damage finishes. Roll casters across a hard surface to dislodge hair and debris that affects smooth movement. Address any gas lift issues (gradual height drift or rough operation) promptly rather than continuing to use a compromised mechanism.
Your Branch Ergonomic Chair represents an investment in daily comfort and long-term health. By following this precise assembly guidance and utilizing Branch’s comprehensive support resources—including their Assembly and User Guide, Assembly Video, and Usage Video—you ensure your chair delivers optimal ergonomic benefits from day one through years of productive use. When questions arise during assembly, remember Branch’s live chat support (9 AM-5 PM Eastern Time) and email support at hello@branchfurniture.com stand ready to help you achieve perfect chair setup.
Leave a Reply