You’ve probably felt it by mid-afternoon—the nagging ache in your lower back, the stiffness in your neck, or the dull throb in your shoulders. Nearly 81% of sewing machine operators experience these musculoskeletal symptoms at least once or twice weekly, according to research across textile manufacturing hubs. The repetitive hand motions combined with forward-leaning postures create cumulative strain that manifests primarily in the back, neck, and upper limbs. Beyond the primary sewing tasks, operators handle cut panels, thread machines, wind bobbins, and adjust tension—all while maintaining awkward positions for hours. Understanding ergonomics for sewing machine operators isn’t just about comfort; it’s essential for preventing career-limiting injuries and maintaining productivity throughout your workday.
The textile industry employs millions globally, with operators performing highly repetitive tasks requiring constant concentration and precise motor control. Modern cellular manufacturing configurations often require rapid movement between machines during style changeovers, forcing operators into standing positions on hard factory floors. This article reveals specific, actionable ergonomic solutions proven to reduce strain—whether you’re sitting at a traditional workstation or standing in a U-shaped production cell. You’ll learn how to identify your specific risk factors, make immediate workstation adjustments, and implement practices that prevent chronic pain from becoming part of your daily routine.
Why Your Daily Sewing Routine Causes 81% of Operators Weekly Musculoskeletal Pain
The repetitive nature of sewing work creates perfect conditions for cumulative strain injuries. Research examining 552 female sewing machine operators in Sri Lanka found that approximately 81% experience musculoskeletal symptoms weekly. These symptoms develop from maintaining forward trunk inclination and neck flexion positions to achieve better visual control over work. The constant hand movements required for garment assembly place extraordinary demands on your upper extremities while your posture strains your spine.
How Repetitive Motion Damages Tissue Over Time
Each sewing stitch creates micro-trauma that accumulates when given insufficient recovery time. Your tendons and ligaments undergo continuous loading without adequate rest periods, leading to inflammation and pain. This explains why shoulder, neck, and wrist discomfort are among the most commonly reported symptoms. The damage isn’t immediate—it builds silently until you notice persistent pain that affects your work quality and daily life.
Identifying Your Personal Risk Threshold
Your tolerance for repetitive strain varies based on multiple factors including age, body mass index, and previous injuries. Younger operators may experience different symptom patterns than those with more experience, as cumulative exposure produces progressive musculoskeletal degradation. If you’ve noticed increasing discomfort after work hours or difficulty performing household tasks, these signal that you’ve exceeded your personal risk threshold and need immediate ergonomic intervention.
Standing Sewing Stations: How Knee and Foot Pain Develops After 2 Hours
Standing workstations have become increasingly common in modern cellular manufacturing setups, but they introduce distinct lower body strain that sitting positions avoid. Research on standing sewing machine operators reveals that knee, foot, thigh, and lower leg discomfort actually exceeds upper body symptoms in this configuration. After just two hours of continuous standing on hard factory surfaces, blood pooling in the lower extremities begins, reducing oxygen delivery to working muscles.
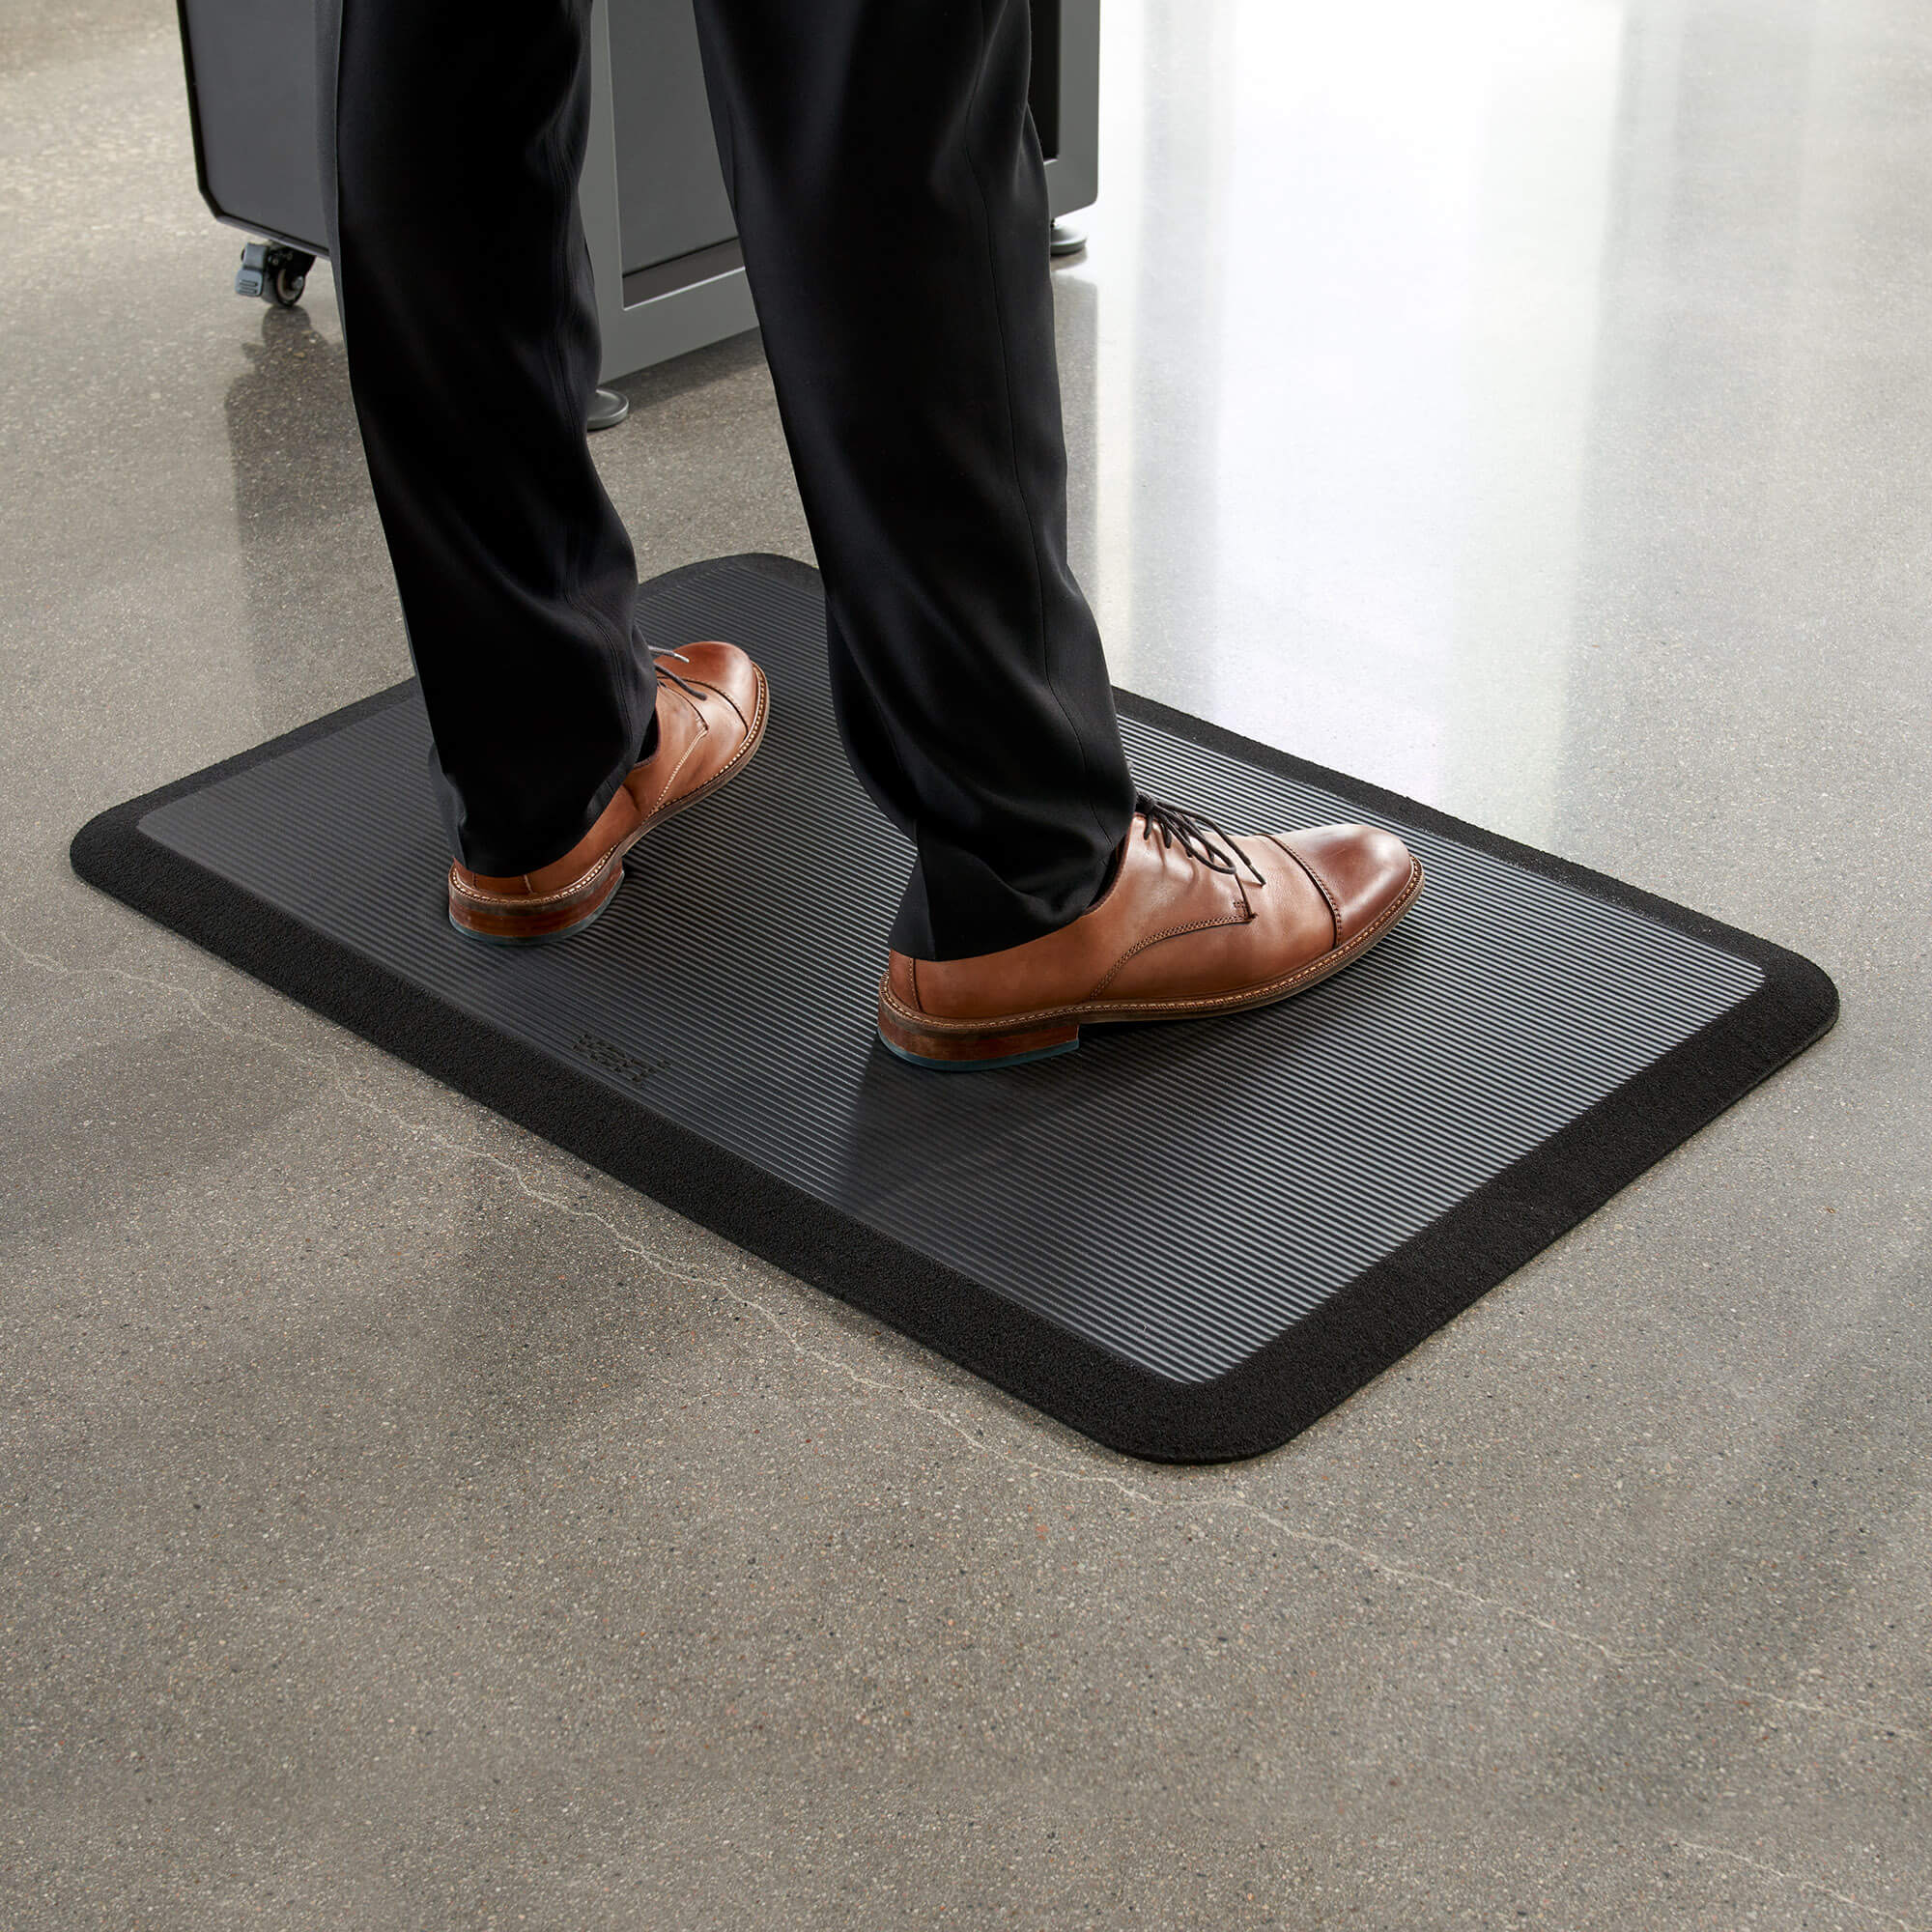
The Hard Floor Problem and Its Solution
Standing on concrete or tiled factory floors dramatically increases pressure on your feet and joints. The solution? Anti-fatigue mats provide critical cushioning that reduces impact forces and encourages subtle muscle activity in your legs. Studies specifically recommend these mats as a priority intervention for standing operators, noting they can reduce lower limb discomfort by up to 50% when properly selected and maintained.
Proper Foot Positioning for Standing Operators
Place one foot on a small footrest while operating your machine to shift weight distribution. This simple adjustment reduces static loading on both legs by allowing periodic weight shifting. If your factory uses height-adjustable stands, ensure the platform allows comfortable foot placement with knees slightly bent, not locked. Operators who walk significant distances to reach their workplaces face compounded strain—consider requesting seating during breaks to allow lower limbs recovery time.
Sitting Workstations: The Neck Flexion Trap That Creates Chronic Shoulder Pain
Sitting eliminates lower limb strain but introduces dangerous upper body postures that cause chronic neck and shoulder issues. Operators working in sitting positions consistently report higher rates of back, neck, and shoulder discomfort compared to standing colleagues. This occurs primarily because improper seating forces forward head position and elevated shoulder angles that strain your cervical spine and trapezius muscles.
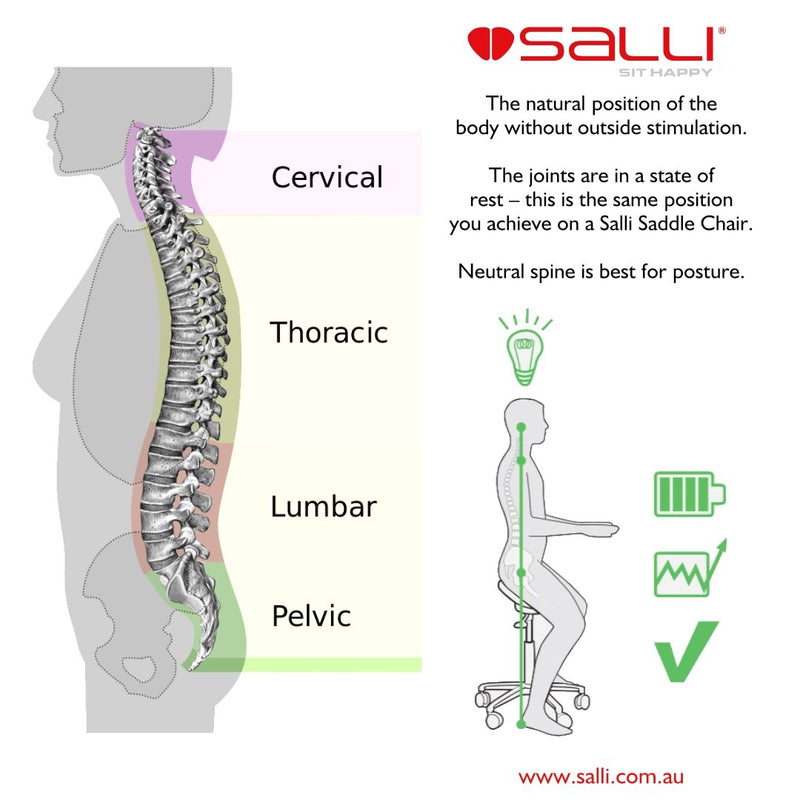
How to Set Your Chair Height for Neutral Spine Alignment
Your chair height determines whether you maintain a healthy posture or strain your neck and shoulders. Adjust your seat so your elbows rest at 90-100 degrees with forearms parallel to the work surface. Your feet should rest flat on the floor or a footrest with knees slightly lower than hips. Most generic chairs provided in factories fail to accommodate diverse body sizes—request a chair with lumbar support that matches your spinal curve and prevents the “slumped” position that causes lower back pain.
The 20-20-20 Rule for Visual Strain Prevention
Every 20 minutes, look at something 20 feet away for 20 seconds. This simple practice reduces eye strain that contributes to forward head posture. Position your sewing machine so you don’t need to lean forward to see your work—raise the machine platform if necessary rather than lowering your head. Your eyes should look slightly downward at your work, not straight ahead or upward, which forces unnatural neck positioning.
How to Conduct a 5-Minute Ergonomic Self-Assessment at Your Sewing Machine
You don’t need specialized tools to identify major ergonomic risks at your workstation. This quick self-assessment reveals problem areas needing immediate attention:
The Posture Check Sequence
Stand up from your chair and approach your workstation as if starting work. First, observe your natural hand position—your shoulders should not be elevated when resting hands on the sewing surface. Next, check your neck position—your ears should align vertically with your shoulders, not protruding forward. Finally, note your lower back curve—your chair should support your natural lumbar curve, not flatten it against a straight backrest.
The Pain Mapping Technique
At the end of your shift, use the modified Corlett and Bishop body map to document exactly where you feel discomfort. Rate each area from 0 (no discomfort) to 10 (extreme discomfort). Tracking this weekly reveals patterns indicating specific workstation problems. For example, consistent right shoulder pain may indicate improper thread tension adjustment requiring excessive reaching.
Fix Your Sewing Machine Height: The 2-Inch Rule for Reducing Lower Back Strain

The vertical positioning of your sewing machine determines spinal loading throughout your shift. When set too low, your workstation forces forward trunk inclination that strains lumbar discs and ligaments. Research identifies proper machine height as one of the most critical ergonomic factors for sewing operators.
The Simple Height Adjustment Formula
Measure from the floor to the crease behind your knee while seated. Subtract 2 inches from this measurement—that’s your ideal sewing surface height. This “2-inch rule” ensures your work surface sits slightly below elbow height when your arms rest comfortably at your sides. Machines mounted on stands without proper adjustability force detrimental postures regardless of your height—advocate for height-adjustable platforms that accommodate operator anthropometric variation.
Warning Signs Your Machine Height Is Wrong
Persistent lower back stiffness after sitting, numbness in your legs during work, or needing to slide forward on your chair all indicate improper machine height. Operators working at incorrectly positioned stations often develop compensatory movements that strain multiple body regions simultaneously. Adjusting machine height may require coordinating with maintenance staff, but the investment in proper positioning pays dividends in reduced pain and increased productivity.
Why Your Current Chair Is Worsening Your Posture (And 3 Immediate Fixes)
Most factory-provided chairs fail to support proper posture during extended sewing shifts. Inadequate seating design ranks among the top contributors to operator discomfort according to ergonomic research. Generic chairs that don’t accommodate diverse body sizes force operators into positions that strain the spine and supporting musculature.
The Lumbar Support Emergency Fix
Roll a towel and secure it vertically along the curve of your lower back. This makeshift lumbar support maintains your spine’s natural curve, reducing disc pressure by up to 40% compared to slumped sitting. Proper lumbar alignment prevents the forward head position that causes neck and shoulder strain—your head weighs 10-12 pounds, and each inch forward doubles the load on your cervical spine.
Seat Depth Adjustment for Thigh Comfort
Your chair should allow 2-3 fingers’ width between the seat edge and the back of your knees. Too much space creates unsupported thigh pressure, while too little restricts blood flow. If your chair lacks depth adjustment, sit farther back and use a cushion to fill the gap behind your lower back. This simple modification prevents that “pins and needles” sensation in your legs that develops from improper seating.
Essential Ergonomics Training: 5 Must-Know Practices for Every Sewing Operator
Proper ergonomics training transforms how you approach your workday, preventing strain before it becomes injury. Research specifically recommends basic ergonomics education for improving sewing machine operators’ work-life quality. These five practices should form the foundation of your daily routine:
The Micro-Break Strategy That Reduces Daily Strain
Take 30-second breaks every 30 minutes to perform these actions:
– Stand up and stretch your arms overhead
– Gently rotate your neck in both directions
– Shake out your hands and wrists
– Look away from your work at a distant object
These micro-breaks reset your posture and reduce cumulative strain without disrupting productivity. Operators who implement regular micro-breaks report 30% less end-of-shift discomfort according to textile industry studies.
Proper Material Handling Techniques
Lift cut panels close to your body with bent knees, not your back. Many operators develop lower back injuries from improper handling of fabric bundles between sewing stages. Keep materials within your “power zone”—between shoulder and mid-thigh height—to avoid excessive reaching or bending. Request storage solutions that position frequently used items within easy reach to minimize unnecessary twisting motions that strain spinal ligaments.
Implementing Effective Job Rotation: A 4-Step Plan for Production Managers
Job rotation represents one of the most effective organizational interventions for reducing cumulative strain. By varying physical demands throughout the workday, rotation allows previously stressed muscle groups recovery time while maintaining productivity. Research supports job rotation as a viable strategy for reducing musculoskeletal symptom development among sewing operators.
Creating a Rotation Schedule That Actually Works
First, analyze all tasks within your production cell to identify those with different physical demands. Second, group operators based on skill level and physical capabilities. Third, design a rotation sequence that moves workers between dissimilar tasks every 60-90 minutes. Fourth, monitor operator feedback and adjust as needed—effective rotation reduces strain without compromising quality or output. The goal is to vary postures and movements, not merely shift identical strain patterns between stations.
Final Note: By implementing these evidence-based ergonomic solutions, sewing machine operators can significantly reduce their risk of developing chronic musculoskeletal disorders. Start with the simplest adjustments—proper chair height, micro-breaks, and anti-fatigue mats—then progress to more comprehensive workstation modifications. Remember that preventing pain is always more effective than treating it after symptoms become chronic. Share these strategies with your colleagues and supervisors to create a workplace culture that prioritizes operator health alongside productivity. When ergonomics for sewing machine operators becomes a shared priority, everyone benefits from reduced absenteeism, higher quality work, and a more sustainable career in the textile industry.
Leave a Reply