Your back aches, your neck feels stiff, and your wrists tingle after another long day at the computer. You’re not alone—millions of workers experience discomfort from poorly configured workstations. Learning how to set up an ergonomic computer station properly transforms your work experience from painful to productive. This guide cuts through the confusion to show you exactly what adjustments matter most for your body type and work habits. Forget one-size-fits-all solutions; we’ll help you customize every element of your workspace to match your unique physiology and prevent the gradual onset of repetitive strain injuries that develop when your workstation works against you.
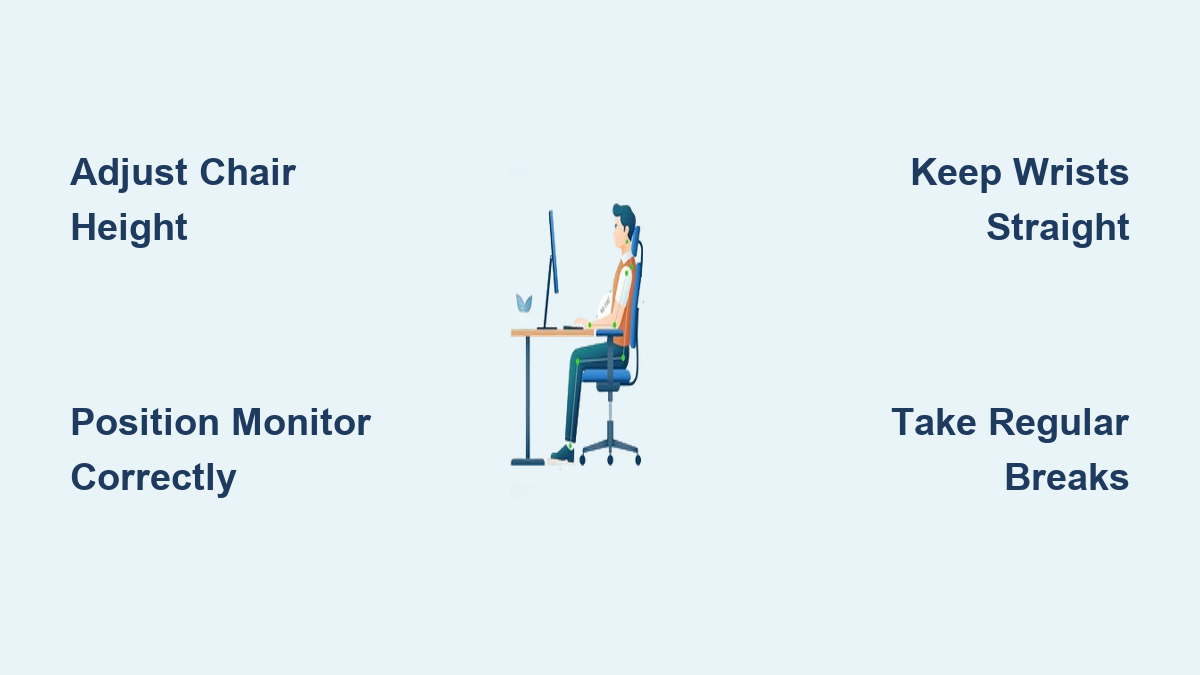
Poorly arranged workstations contribute to 60% of workplace musculoskeletal disorders according to occupational health studies. These issues rarely announce themselves with sudden pain—they creep in gradually through subtle misalignments that force your body into unnatural positions for hours each day. By understanding how to set up an ergonomic computer station correctly, you’ll position your monitor at eye level, align your keyboard to keep wrists straight, and adjust your chair to support your spine’s natural curve. The result? Reduced fatigue, fewer aches, and sustained productivity throughout your workday without sacrificing comfort.
Fix Your Chair Height for Proper Spinal Alignment
Stop Ignoring Your Lumbar Support
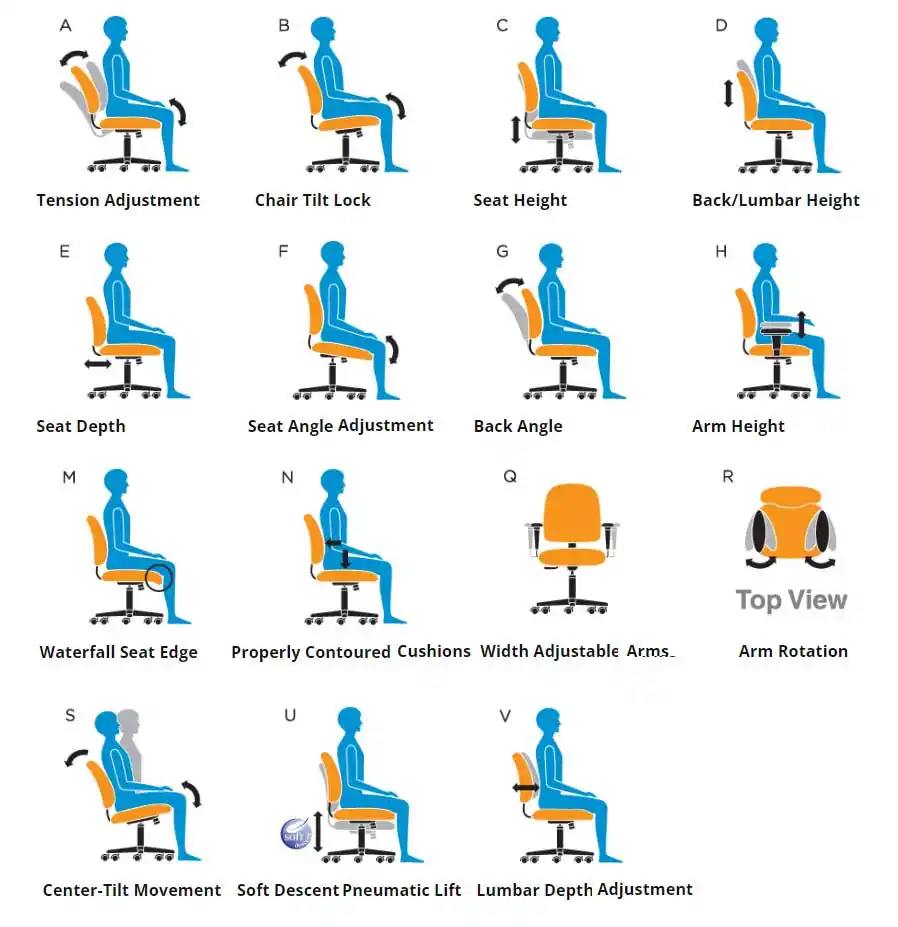
Your chair serves as the foundation of your ergonomic computer station, yet most people never adjust it beyond basic height settings. Proper chair adjustment starts with setting the seat height so your feet rest flat on the floor with knees bent at 90 degrees. If your feet dangle, add a footrest immediately—this prevents pressure on your thigh veins and reduces lower back strain. Your chair’s lumbar support should contact the inward curve of your lower back when sitting upright, not your mid-back. Many chairs let you adjust this support vertically to match your specific spinal anatomy.
Pro Tip: Sit all the way back in your chair before making adjustments. Slouching forward while adjusting creates false positioning that leads to discomfort later. Test different backrest tensions to find what supports your posture without forcing you upright unnaturally. When correctly positioned, you should feel supported but not restrained.
Optimize Armrest Positioning to Prevent Shoulder Strain
Most office chairs come with armrests that do more harm than good when improperly adjusted. Set armrest height so your elbows rest comfortably at 90 degrees with shoulders completely relaxed. If your armrests push your shoulders upward even slightly, you’re setting yourself up for neck and shoulder tension that builds over hours of computer work. Consider removing armrests entirely if they interfere with getting close enough to your keyboard and mouse.
Armrests positioned too low force you to slump forward, straining your lower back. The ideal position allows your forearms to rest lightly while typing, reducing the weight your shoulder muscles must support. If your chair lacks proper armrest adjustment, look for models with 4D armrests that adjust height, width, depth, and angle for perfect positioning.
Correct Desk Height to Eliminate Wrist and Shoulder Pain

Solve the Too-High Desk Dilemma
Standard desks sit at 29-30 inches, but this height forces most people into harmful wrist extension while typing. If your desk can’t be lowered, raise your chair until your elbows reach 90 degrees, then use a footrest to keep your feet supported. Your forearms should slope slightly downward toward the keyboard—not upward—which keeps wrists in a neutral, straight position that prevents carpal tunnel pressure.
Warning: Never work with your wrists bent upward while typing. This position compresses nerves in your carpal tunnel and is a primary cause of repetitive strain injuries. If you notice your wrists bending back while typing, your desk is almost certainly too high for your body dimensions.
Organize Your Workspace to Minimize Awkward Movements
Place your keyboard and mouse directly in front of you with the space bar aligned with your body’s center line. Keep your mouse close enough that you don’t have to reach—your elbow should stay near your body when using it. Create a “primary work zone” within a 15-20 inch radius where you keep items you use constantly. Anything you touch less frequently can live at the edges of your desk.
Document holders deserve special attention—they should sit next to your monitor at the same height and distance. This prevents the constant head turning that causes neck strain when you reference printed materials while typing. If you use multiple monitors, position your main screen directly in front of you and angle secondary screens no more than 30 degrees to avoid excessive neck rotation.
Position Your Monitor to Prevent Neck and Eye Strain
Set Monitor Height for Neutral Neck Position
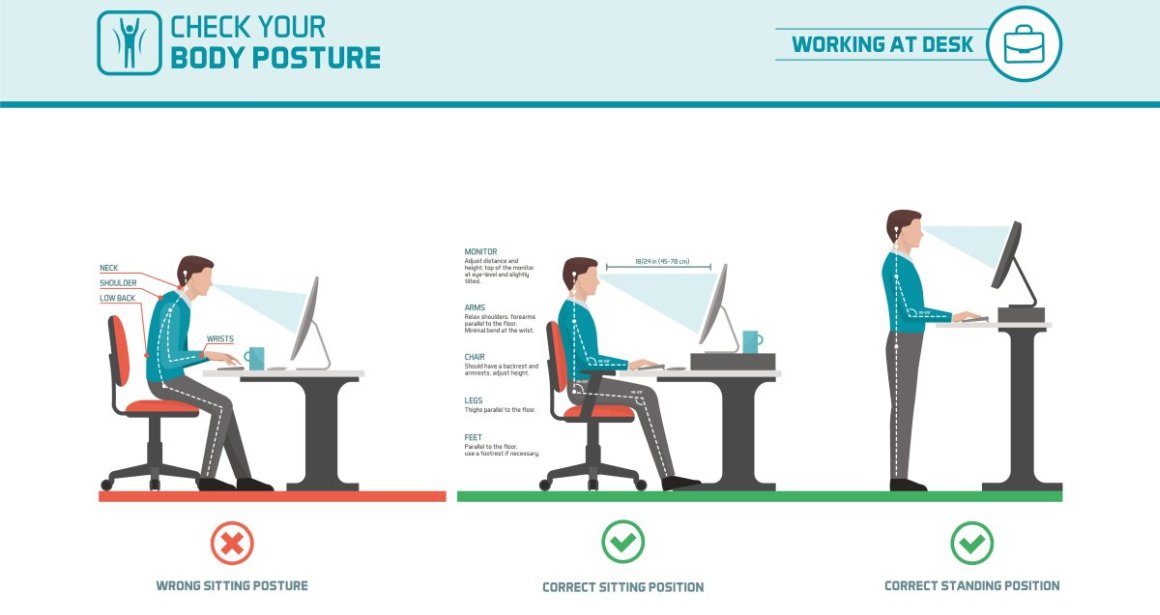
The top third of your monitor should sit at or slightly below eye level when you’re looking straight ahead. This allows you to view the screen with your head balanced over your spine—not craned forward or tilted upward. Measure 20-26 inches from your eyes to the screen; this distance lets you see content clearly without leaning forward. If you wear progressive lenses, you may need to lower your monitor slightly to view through the proper part of your lenses.
Common Mistake: Many people place laptop screens directly on their desk, forcing them to look down at an uncomfortable angle for hours. Always use a laptop stand that raises the screen to proper height, and connect an external keyboard and mouse so you can position them at correct typing height.
Eliminate Glare That Causes Squinting and Headaches
Position your monitor perpendicular to windows—not facing them directly or with windows behind you. Direct sunlight on your screen creates glare that forces squinting and unnatural head positions. Close blinds during peak sunlight hours or install anti-glare screen filters that reduce reflections without distorting content. Adjust screen brightness to match ambient lighting—your monitor shouldn’t glow like a beacon in a dim room or disappear in bright office lighting.
Clean your screen weekly with proper cleaning solution. Dust and fingerprints reduce clarity, making your eyes work harder to focus. Enable night mode settings that reduce blue light emission during evening hours, which helps maintain natural sleep cycles and reduces eye fatigue.
Configure Keyboard and Mouse for Wrist Health
Maintain Straight Wrist Position While Typing
Center your keyboard directly in front of you with your elbows bent at 90 degrees and shoulders relaxed. Your wrists should float freely while typing—not resting on any surface. Only use wrist rests during pauses between typing sessions to maintain neutral wrist position. If your keyboard slopes away from you (negative tilt), it encourages proper wrist alignment better than traditional upward-tilted keyboards.
Pro Tip: Type with your hands and wrists floating slightly above the keyboard, allowing your fingers to do the work. Resting your wrists on any surface while actively typing compresses delicate nerves and tendons in your wrist.
Choose Input Devices That Match Your Hand Anatomy
Place your mouse close to your keyboard at the same height level. Move the mouse using your entire arm from the elbow—not just your wrist—to reduce forearm strain. If you experience discomfort with traditional mice, experiment with vertical mice that keep your hand in a handshake position, trackballs that minimize arm movement, or pen tablets that distribute workload differently across hand muscles.
Take micro-breaks every 20-30 minutes to shake out your hands and stretch your fingers. Simple stretches like making a fist and slowly opening your hand wide can prevent the gradual buildup of tension that leads to chronic pain.
Implement Healthy Work Habits Beyond Equipment Setup
Break the Sitting Cycle Every 30 Minutes
Even the most perfectly configured ergonomic computer station can’t counteract the effects of sitting motionless for hours. Set a timer to stand up for 1-2 minutes every half hour—walk to get water, stretch, or simply stand while taking phone calls. This simple habit dramatically improves circulation and prevents the muscle fatigue that builds during prolonged static positions.
Follow the 20-20-20 rule religiously: every 20 minutes, look at something 20 feet away for 20 seconds. This gives your eye muscles a break from constant near-focus work and reduces digital eye strain.
Create an Ergonomic Maintenance Routine
Your body changes and your work demands evolve, so reassess your workstation setup monthly. Sit in your normal working position and check for any creeping discomfort you’ve started to ignore. Have you begun leaning forward? Are your shoulders tensing up by afternoon? These subtle signs indicate your setup needs adjustment.
Invest in quality equipment that offers real adjustability—not just marketing claims. A chair with proper lumbar support, a height-adjustable desk, and a monitor arm that lets you fine-tune positioning pay for themselves in reduced pain and increased productivity. Remember, setting up an ergonomic computer station isn’t a one-time project but an ongoing process of refinement as your body and work needs change.
Creating an ergonomic computer station properly requires attention to multiple interconnected elements, but the payoff in comfort and productivity makes it worthwhile. Start with chair height and monitor position—the two factors that cause the most immediate strain—then refine other elements as needed. Your future self will thank you when you’re still working comfortably years from now, free from the chronic pain that plagues so many computer users. Take action today to transform your workspace from a source of discomfort to an environment that actively supports your health and performance.
Leave a Reply