Your wrists ache after just an hour at the keyboard. Your shoulders feel tight, your neck stiffens, and by afternoon, you’re rubbing your thumbs trying to relieve that nagging numbness. If this sounds familiar, you’re not alone—millions of computer users experience these symptoms because they don’t know how to type ergonomically. Proper ergonomic typing transforms how your body feels during long computer sessions, protecting your wrists, shoulders, neck, and lower back from the cumulative strain that leads to pain, reduced productivity, and serious repetitive stress injuries. Whether you spend two hours or eight hours daily at a keyboard, the way you position your body and configure your workspace determines whether typing becomes a source of chronic discomfort or a comfortable, sustainable activity. This guide walks you through achieving neutral posture, avoiding common setup mistakes, selecting the right equipment, and maintaining musculoskeletal health over the long term.
Achieve Neutral Posture While Typing
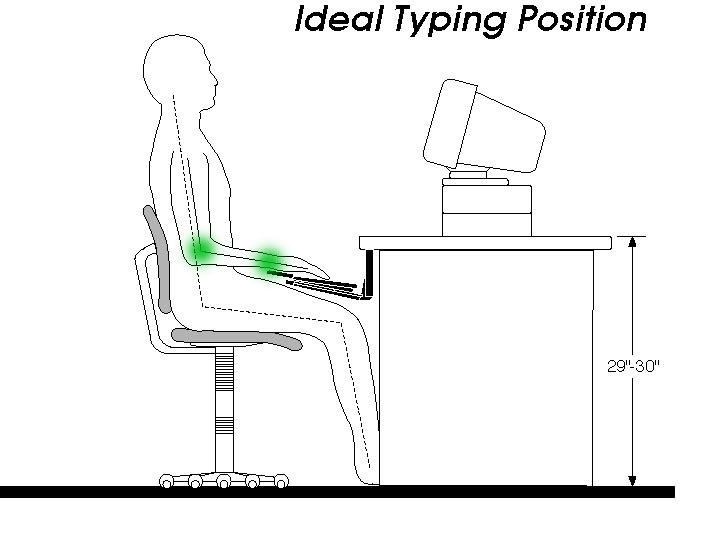
The foundation of ergonomic typing lies in achieving and maintaining neutral posture—a body position where joints align naturally, muscles experience minimal tension, and circulation flows without restriction. In neutral posture, your wrists remain straight rather than bent upward toward your forearms or downward toward your palms, and your arms position in ways that prevent shoulder elevation, upper arm tension, and neck strain throughout typing sessions. This isn’t just about comfort; it’s about preventing the cumulative damage that leads to carpal tunnel syndrome, tendonitis, and chronic pain.
Neutral posture matters because it minimizes both static muscle loads (the continuous tension required to hold your body in position) and dynamic muscle loads (the effort involved in actual finger movements). When properly configured, your low back rests against your chair’s lumbar support, maintaining the natural inward curve of your spine and preventing the slouching that places excessive pressure on intervertebral discs. Your shoulders relax, your neck releases tension, and your arms can type efficiently without the constant muscle activation that leads to fatigue during extended sessions.
Optimal Elbow and Arm Positioning
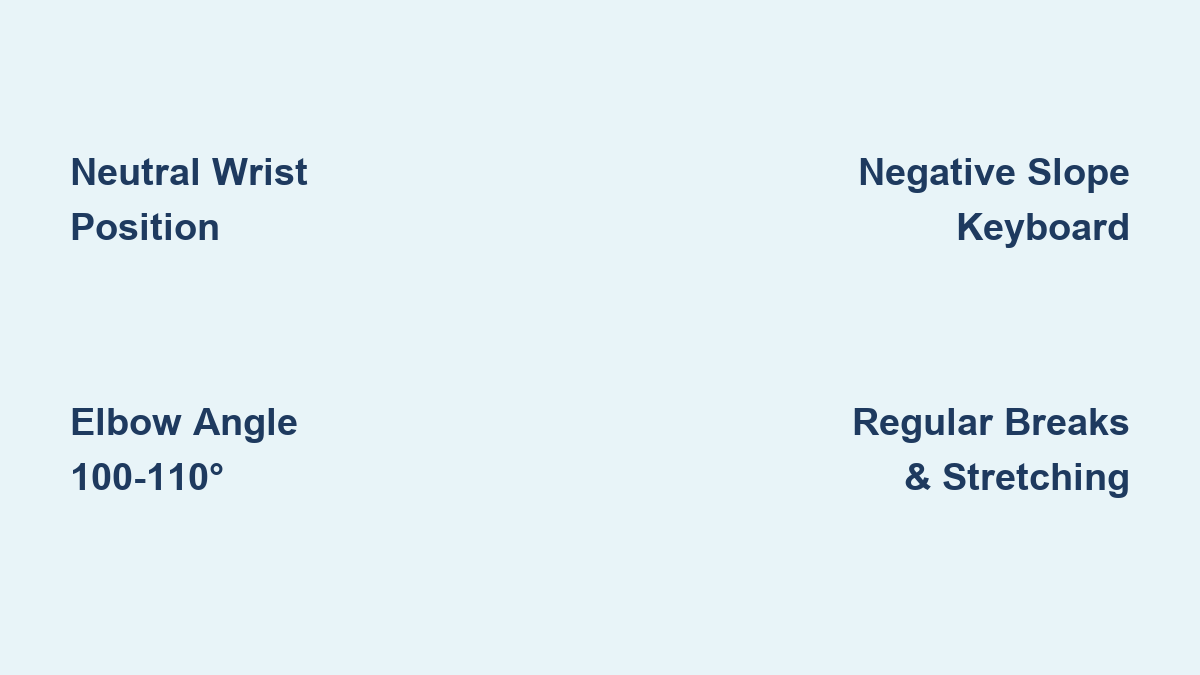
Your elbow angle plays a critical role in neutral posture typing, opening beyond the 90-degree angle that many users instinctively adopt. This slightly extended elbow position promotes circulation to your lower arms and hands while preventing compression of the ulnar nerve and median nerve at the elbow joint. When elbows bend tightly, these nerves become compressed, restricting the neural signals that control hand and finger movements and contributing to the numbness, tingling, and reduced dexterity that many computer users experience during long work sessions.
Maintain this optimal elbow position by ensuring your keyboard sits below your seated elbow height. When properly positioned, your elbows should form a 100-110 degree angle rather than a tight right angle. This small adjustment creates significant physiological benefits:
- Improved blood flow to your hands and fingers
- Reduced nerve compression at the elbow joint
- Decreased muscle fatigue in your upper arms and shoulders
- Better overall circulation throughout your upper body
Pro Tip: Set a timer to check your elbow position every 30 minutes. Most people unconsciously raise their shoulders and bend their elbows tighter as they focus on work—catching these subtle posture shifts early prevents cumulative strain.
Wrist and Hand Alignment
The most mechanically critical element of ergonomic typing involves keeping your wrists straight throughout typing sessions. When wrists bend into extension (the upward bending position where palms face toward you), pressure increases within the carpal tunnel and strains the tendons controlling finger movement. This extension often develops gradually as forearm muscles fatigue during extended sessions, particularly when keyboards sit at heights that force arms to sag downward.
Maintaining straight wrists requires positioning your keyboard below your seated elbow height and angling it to create what ergonomics specialists call a negative slope configuration. In this setup, the keyboard base angles away from you, with front keys lower than back keys, allowing your fingers to reach all keys without bending your wrists upward. This simple geometric adjustment addresses the primary mechanical cause of wrist strain during typing and forms the foundation upon which all other ergonomic improvements build.
Visual cue: When properly positioned, your hands should look like they’re resting on a table—flat and straight from forearm to fingertips, with no upward or downward bend at the wrist.
Avoid These Common Typing Setups

Problems with Desk-Top Keyboards
Placing your keyboard directly on a standard desk creates one of the most common work postures in office environments, yet this configuration frequently leads to significant ergonomic problems. The fundamental issue with desk-top keyboard placement is that it makes maintaining neutral wrist posture extremely difficult, especially as fatigue sets in during extended typing sessions.
As your forearms begin to sag downward, your wrists get forced into extension to reach the keys, creating the same nerve compression and tendon strain patterns associated with repetitive strain injuries. Your elbow position typically involves significant flexion, with elbows bent at angles considerably less than 90 degrees, compressing the median nerve and ulnar nerve at the elbow joint and restricting blood flow to your hands. The combination of restricted circulation and compressed nerves creates conditions favorable to developing carpal tunnel syndrome and other cumulative trauma disorders.
Critical mistake: Many users try to compensate for desk-top height by raising their chairs, but this creates new problems—feet dangle without floor support, and the resulting instability forces your core muscles to work harder to maintain balance, increasing overall fatigue.
Why Conventional Keyboard Trays Fall Short
Many offices attempt to address desk-top keyboard problems by installing conventional articulating keyboard trays beneath the desk surface. While these trays can position keyboards lower than desk level, they frequently introduce or exacerbate postural problems when not properly adjusted. The most common issue involves keyboards set at steep angles, which creates the same neutral wrist posture difficulties that desk-top positioning produces.
When keyboard trays angle steeply, users find it difficult or impossible to maintain neutral wrist positions regardless of how low the tray sits. The steep angle forces hands into extension to reach keys, particularly toward the back of the keyboard, and this extension creates identical nerve compression and tendon strain patterns. Studies examining wrist posture with various keyboard tray configurations consistently show that conventional articulating trays do not substantially improve wrist posture compared to desk-top placement, despite their additional cost and workspace consumption.
Warning: Before investing in an expensive keyboard tray system, test your current setup with a simple book or riser under your chair to lower your seated position relative to your keyboard. You may achieve better results with this low-cost solution.
Configure Your Equipment Correctly
Select and Position Your Keyboard
Achieving ergonomic typing begins with selecting appropriate equipment and configuring it for your individual body proportions. Keyboards designed with ergonomic considerations—such as those featuring negative slope designs, split layouts, or tented key surfaces—facilitate neutral wrist posture more effectively than conventional flat keyboards. The negative slope design directly addresses wrist extension by allowing fingers to reach keys without bending wrists upward.
Keyboard height must calibrate to your body proportions and chair height, positioning the keyboard below your seated elbow height. Begin by adjusting your chair so that when sitting with feet flat on the floor and back supported by the lumbar cushion, your elbows hang naturally at your sides. Your keyboard surface should then position no higher than this elbow level, ideally several inches below to allow for a slightly opened elbow angle. This positioning may require either an adjustable chair with appropriate range or a keyboard tray that positions at the correct height.
Quick setup guide:
1. Sit with feet flat on floor, back against chair
2. Let arms hang naturally at sides
3. Note elbow height
4. Position keyboard 1-3 inches below this height
5. Angle keyboard for negative slope (front lower than back)
Optimize Your Chair and Monitor
An ergonomic chair with adjustable lumbar support, seat height, and armrest position allows you to configure seating that supports neutral spine posture throughout typing sessions. The lumbar support maintains your lower spine’s natural inward curve, preventing slouching that increases intervertebral disc pressure and contributes to lower back pain. Armrests, when present, should support forearms without forcing shoulders upward, allowing shoulders to remain relaxed while forearms receive adequate support.
Your monitor should position directly in front of you at a distance allowing comfortable viewing without neck flexion or extension—typically arm’s length away with the top of the screen at or slightly below eye level. This positioning prevents neck strain from turning heads to view the screen or tilting necks excessively to read text. Positioning monitors to avoid glare from windows and overhead lighting, with adequate ambient illumination to prevent eye strain, supports the overall ergonomic environment and influences body position in ways that compound the effects of direct ergonomic interventions.
Maintain Ergonomic Health Long-Term

Take Effective Rest Breaks
Even with optimal typing posture and properly configured equipment, your body requires periodic movement to maintain musculoskeletal health during extended computer use. Ergonomic recommendations consistently emphasize the importance of regular rest breaks—brief pauses during which you step away from your keyboard, stretch, and change position. These breaks interrupt cumulative effects of sustained posture, allowing muscles to recover from static loading and joints to move through their full range of motion.
Effective rest break strategies include the Pomodoro technique, working in focused 25-30 minute intervals followed by 5-minute breaks, as well as longer breaks every two hours during which you stand, walk, and perform stretching exercises. During typing breaks, shake your hands and fingers loosely to promote circulation, stretch your forearms and wrists to prevent tendon tightening, and roll your shoulders and neck to release accumulated tension. These simple movements, performed consistently throughout the workday, significantly reduce your risk of developing repetitive strain injuries.
Stretch and Strengthen Supporting Muscles
Complementing rest breaks, specific stretching and strengthening exercises improve typing ergonomics and reduce injury risk. Wrist stretches, performed by extending one arm with your palm facing up and using your other hand to gently press your fingers back toward your body, stretch forearm flexors and relieve tension that builds during typing. Similar stretches with palms facing down target forearm extensors, providing balanced relief across muscle groups responsible for finger movement.
Forearm strengthening exercises using light resistance bands or dumbbells increase endurance of muscles supporting your wrists and hands during typing. Stronger muscles fatigue more slowly, allowing you to maintain neutral posture for longer periods without the sagging and subsequent wrist extension leading to strain. Neck and shoulder strengthening exercises, particularly those targeting lower trapezius and scapular stabilizers, improve your ability to keep shoulders relaxed while typing, reducing upper trapezius tension contributing to neck pain and headaches.
Monitor and Adjust Continuously
Ergonomic typing is not a static condition achieved once and forgotten but an ongoing process of monitoring and adjustment. Periodically assess your posture throughout the workday, checking whether your shoulders have crept upward, whether your wrists have dropped into extension, or whether your lower back has lost contact with your chair’s lumbar support. Regular self-assessment, perhaps triggered by computer reminders every 30-60 minutes, helps you catch and correct postural drift before it leads to strain.
Equipment adjustments may become necessary as your needs change or as you develop awareness of subtle discomfort signals. A keyboard that seemed positioned correctly may need lowering as you learn to relax your shoulders, or your chair’s lumbar support may require recalibration as sitting habits improve. This iterative process of adjustment and refinement, guided by attentiveness to bodily signals, ultimately leads to the most comfortable and sustainable ergonomic typing configuration for your individual body. Your body’s feedback is the best ergonomic consultant—learn to listen to it before discomfort becomes injury.
Leave a Reply