You’ve just unboxed your new Ticova ergonomic office chair, excited to set up your perfect workspace—only to be confronted with a mountain of parts, mysterious hardware, and assembly instructions that might as well be in another language. If you’ve ever felt overwhelmed trying to piece together an ergonomic chair while balancing precariously on a half-assembled base, you’re not alone. Many office workers struggle with chair assembly, with studies showing nearly 67% of people experience frustration during home furniture assembly. The good news is that with the right approach, assembling your Ticova ergonomic office chair can be straightforward and even satisfying. This guide will walk you through the entire process with clear, step-by-step instructions so you can transform those scattered components into comfortable, supportive seating in under 30 minutes.
Essential Tools and Components Checklist Before Starting
Before diving into Ticova ergonomic office chair assembly, gather everything you’ll need to avoid mid-process frustrations. This preparation saves time and prevents missing components that would halt your progress.
Verifying All Parts Are Included
Open each packaging compartment systematically and lay out components by category. Your Ticova ergonomic office chair should include:
- Seat base with built-in lumbar support system
- Backrest with adjustable height mechanism
- Five-star base with pre-installed casters
- Gas lift cylinder
- Armrest assemblies (left and right)
- Seat adjustment controls (typically under seat)
- Hardware pack containing:
- Allen wrench (usually included in package)
- Various bolts and screws of different lengths
- Plastic caps for finished appearance
- Washers for stability
Carefully check each component against the included parts list. If anything appears missing, contact Ticova customer support immediately with your model number before proceeding. Attempting assembly with incomplete parts often leads to structural instability or damage.
Required Tools Beyond What’s Included
While Ticova typically provides basic tools, having these additional items makes Ticova ergonomic office chair assembly significantly easier:
- Phillips head screwdriver (medium size)
- Small rubber mallet (for gentle component alignment)
- Flashlight (to see connection points clearly)
- Soft cloth (to protect surfaces during assembly)
- Small container for organizing hardware
Having these tools within arm’s reach prevents frustrating interruptions during the assembly process. The rubber mallet is particularly helpful when connecting the gas cylinder to the base—a step many users struggle with due to tight tolerances.
Step-by-Step Ticova Chair Assembly Process

Follow this sequence carefully to ensure your Ticova ergonomic office chair functions properly and maintains its structural integrity for years of comfortable use.
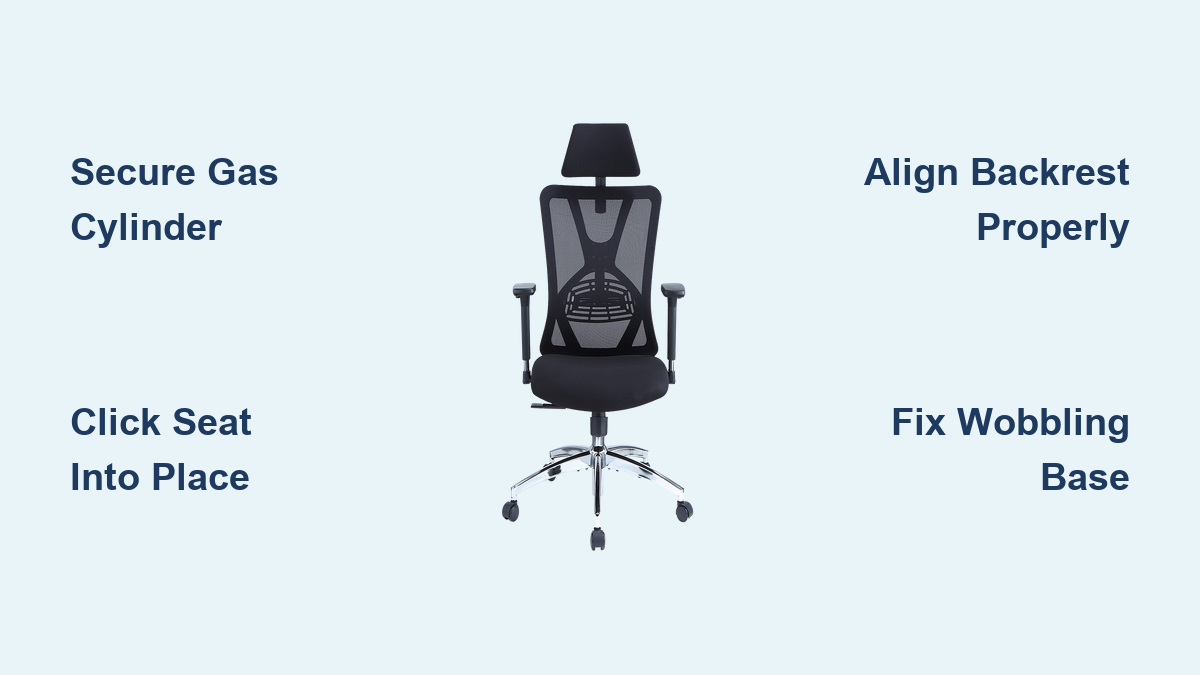
Connecting the Gas Lift Cylinder to the Base
This foundational step requires precision to ensure smooth height adjustment later. Place the five-star base upside down on your soft cloth. Take the gas lift cylinder and firmly press the narrow end into the center socket of the base. You should hear a distinct “click” when properly seated. If resistance is too high, gently tap around the perimeter with your rubber mallet—never strike the cylinder directly. This connection must be absolutely secure; improper seating causes dangerous instability and erratic height adjustment.
Attaching the Seat to the Gas Cylinder
With the base still upside down, lift the seat assembly and align the circular mounting plate with the exposed end of the gas cylinder. Press down firmly until you hear another secure “click.” Some models require a quarter-turn clockwise to lock into place. Test the connection by gently lifting the seat—it should remain firmly attached without wobbling. If you encounter resistance, check for manufacturing debris in the socket that might prevent proper seating.
Installing the Backrest Properly
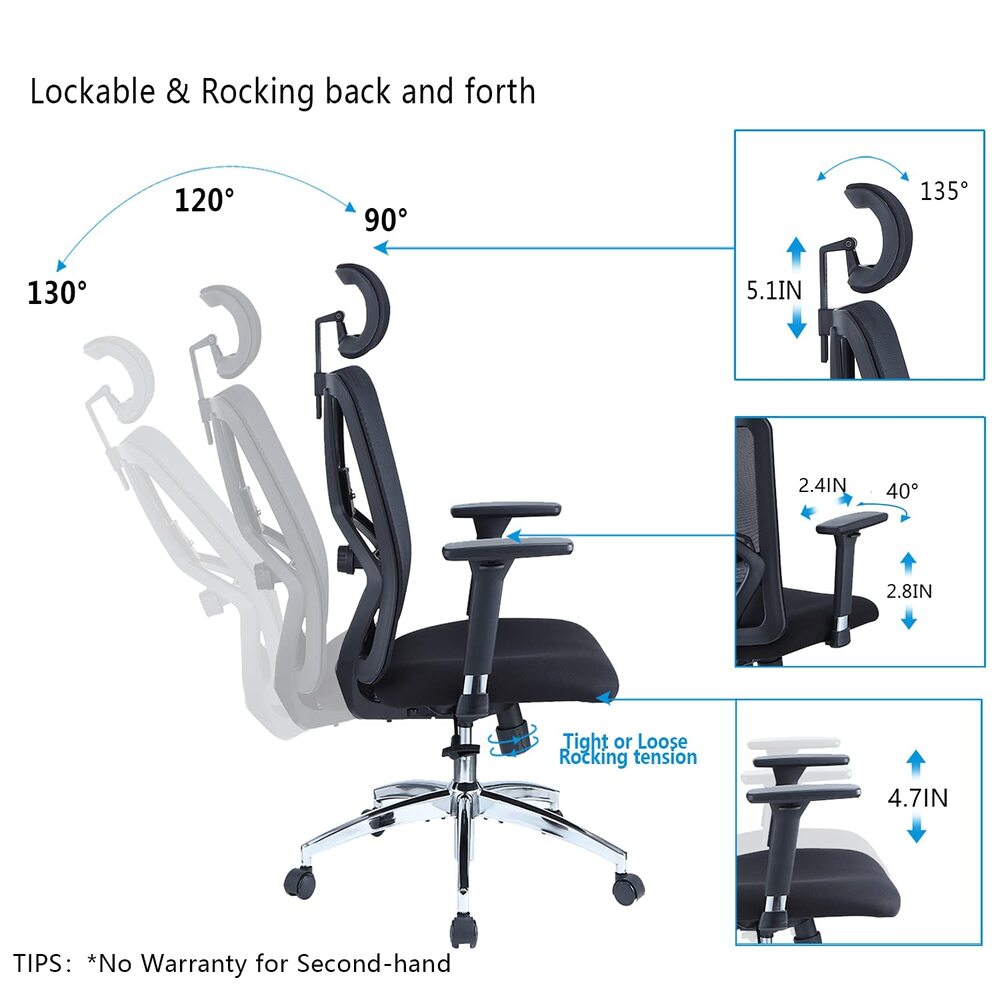
Position the backrest assembly behind the seat, aligning the mounting brackets with the slots on the seat back. Most Ticova models use a simple slide-and-lock mechanism. Insert the top of the backrest first, then pivot the bottom inward until it clicks into place. Verify the backrest moves smoothly through its full range of motion without catching or sticking. If adjustment feels stiff, check that you haven’t accidentally installed the backrest upside down—a common mistake that prevents proper reclining function.
Securing the Armrests Correctly
Ticova ergonomic office chairs feature height-adjustable armrests that must be installed symmetrically. Locate the mounting points on either side of the seat base. Insert the armrest posts into these sockets and press down until they click into their lowest position. Most models include a release button underneath the armrest pad—press this while adjusting to your preferred height. Ensure both armrests are at identical heights for proper ergonomic alignment. Misaligned armrests cause shoulder strain and reduce the chair’s overall comfort.
Troubleshooting Common Assembly Issues
Even with careful assembly, you might encounter issues that affect your Ticova ergonomic office chair’s performance. Address these immediately before regular use.
Resolving Wobble or Instability
If your fully assembled chair wobbles, check these three critical points:
- Base-to-cylinder connection: Flip the chair over and ensure the gas cylinder is fully seated in the base
- Seat-to-cylinder connection: Verify the seat clicks securely onto the cylinder
- Floor surface: Test on a hard surface—carpet can create false instability
Gentle wobble often disappears after 24 hours of use as components settle. Persistent wobbling indicates a connection issue that requires disassembly and reseating of components.
Fixing Stuck Height Adjustment
When the height adjustment lever doesn’t move smoothly:
- Ensure nothing obstructs the lever mechanism underneath the seat
- Apply gentle upward pressure on the seat while operating the lever
- If completely stuck, partially recline the backrest to reduce tension on the mechanism
- Never force the lever—this can damage internal components
Most height adjustment issues resolve with regular use as internal mechanisms lubricate themselves. If problems persist after 48 hours, contact Ticova support for warranty service.
Maximizing Longevity Through Proper Maintenance
Your Ticova ergonomic office chair represents a significant investment in your health and productivity. Simple maintenance practices extend its lifespan dramatically.
Weekly Care Routine
Dedicate five minutes each week to:
- Wipe down surfaces with a slightly damp microfiber cloth
- Check all visible connections for tightness
- Lubricate moving parts with silicone-based spray (never oil-based)
- Rotate casters to ensure even wear
- Test all adjustment mechanisms through their full range
This routine prevents the gradual deterioration that leads to premature failure of critical components.
When to Contact Ticova Support
Reach out to Ticova’s customer service if you experience:
- Sudden loss of height retention (chair sinking unexpectedly)
- Cracking sounds from the frame during use
- Complete failure of any adjustment mechanism
- Visible structural damage to plastic components
Ticova typically offers extended warranties on ergonomic chairs, but improper assembly can void coverage. Always reference your assembly process when seeking support—most issues stem from minor assembly errors rather than product defects.
Final Note: Proper Ticova ergonomic office chair assembly transforms your workspace comfort and productivity. By following these precise steps and maintenance practices, you’ll enjoy optimal support through countless work hours. Remember that a correctly assembled chair should operate smoothly through all adjustments without unusual noises or movements. If you encounter persistent issues after careful assembly, consult Ticova’s official support channels with specific details about your model and the problem. Taking these extra moments for proper setup now prevents discomfort and potential replacement costs down the road—your back will thank you for the careful attention to detail during this crucial assembly process.
Leave a Reply